ImageMagick is a server software. It’s a library to work with images. Usually you want to install it on the server where you host your WordPress.
ImageMagick software usually cannot be used by your site directly, so there should be also Imagick PHP Extension.
Check existing installation
Before installation you should check if it’s already installed. The easiest way to check is to search for it in your php info.
To check phpinfo of your site you can use the WordPress phpinfo() plugin.
Alternatively you can follow the instructions in the WordPress’ Knowledge Base – Finding Server Info
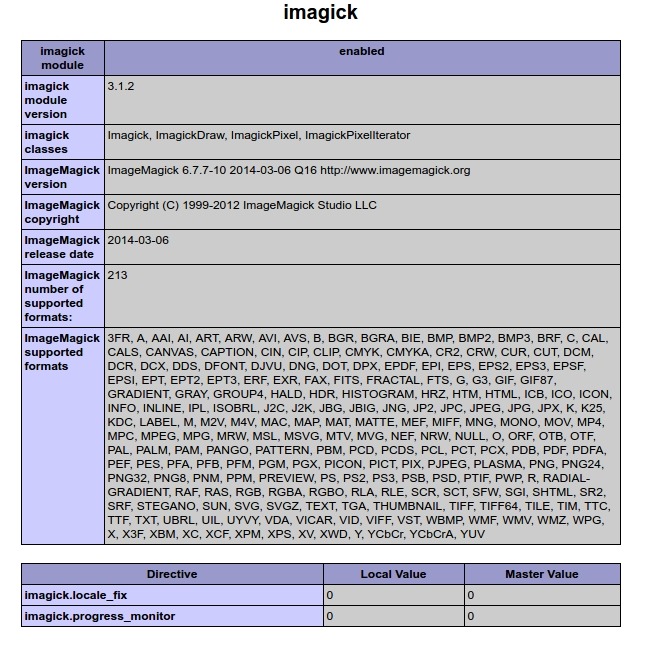
On the phpinfo screen search for “imagick” word. If the word “imagick” is there, then you will see something similar to this:
If you see imagick info, then ImageMagick library and Imagick PHP Extension are already installed and you don’t need to install them.
ImageMagick installation
ImageMagick is a server library. It’s installation requires administrative privileges on the server where you wan’t to install it.
Shared hosting
On most hosting plans (sometimes called “shared hosting“) you won’t have administrative privileges so you won’t be able to install it by yourself.
In this case you should contact your server/hosting provider support for further assistance.
VPS, VDS, personal servers, etc.
If you have administrative privileges or your system administrator has, then you can install it.
The further information will probably require advanced server management skills.
CPanel Command Line Installation
The installation will require to run following commands from the Command Line Interface:
/scripts/installimagemagick
pecl install
After installation you’ll need to restart your webserver.
WHM Installation
Go to WHM -> Software -> Module Installers -> PHP Pecl (manage).
On the box below “Install a PHP Pecl” enter “imagick” and click “Install Now” button.
After installation you’ll need to restart your webserver.
Linux installation
Ubuntu
On Ubuntu operation system the installation will require to run following commands from the Command Line Interface:
apt install imagemagick
apt install php-dev php-pear
pecl install imagick
CentOS
For CentOS 6.7 operation system:
yum install ImageMagick ImageMagick-devel
yum install php-devel php-pear
pecl install imagick
For any Linux installation
After installing you should add “extension=imagick.so” to the php.ini. Also please note that for web version of PHP and Command Line Interface version of PHP have different configuration files, so you should decide where you want to use Imagick extension and add the line“extension=imagick.so” to the corresponding file.
To locate php.ini file you can run the following command:
whereis php.ini
Restart webserver
After installation you’ll need to restart your webserver or restart php-fpm if you use it
service apache2 restart # restart Apache on Ubuntu
service php-fpm restart #restart php-fpm on Ubuntu
service httpd restart # restart Apache on CentOS
service php-fpm restart #restart php-fpm on Ubuntu
More options on serverfault.com
If you have any questions or suggestions please write us on support@teamlead.pw


